

Key Takeaways
A transmission leak can be relatively simple to repair, but the final bill depends heavily on where the fluid is escaping and whether low fluid has caused internal damage.
- Minor gasket, plug, line, or fitting repairs are usually less expensive than internal seal work.
- A red, pink, or brown puddle deserves attention, even when it looks small.
- Diagnosis matters because fluid can travel away from the original leak.
- Driving with low transmission fluid can turn an external leak into major damage.
- Written estimates should identify the failed part, labor, fluid, and follow-up checks.
What transmission fluid leak repair usually costs
The transmission fluid leak repair cost is shaped less by the size of the puddle than by the location of the failed seal, gasket, line, or case. A mechanic must also determine whether the transmission has been driven while low on fluid. That is why two vehicles with similar-looking leaks can receive very different estimates. A careful diagnosis is the best starting point for separating a manageable repair from a much larger transmission problem.
Typical price ranges for minor and major repairs
A minor external repair, such as a pan gasket, drain plug seal, cooler line, or accessible fitting, may often fall in the low hundreds of dollars. More involved output-shaft or axle-seal work can cost several hundred dollars, while a front pump or torque converter seal may require transmission removal and reach roughly $800 to $1,200 or more. If low fluid has caused internal wear, rebuilding or replacing the transmission can raise the bill into the thousands.
These are planning ranges, not promises. Vehicle design, local labor pricing, parts availability, and the condition of the transmission all matter. A transmission leak cost breakdown can help you recognize the difference between an accessible external repair and a job that requires major disassembly.
Labor rates and diagnostic charges
Labor is often the largest variable because access differs dramatically from one vehicle to another. A pan may be reachable from underneath, whereas a front seal can require separating the transmission from the engine. Shops may also charge a diagnostic or inspection fee before they can provide a firm repair estimate.
Ask whether diagnosis is credited toward the repair. It is also reasonable to request the estimated labor hours, hourly rate, and any added charge for cleaning, road testing, or fluid-level checks. Those details make estimates easier to compare.
Parts, fluids, and shop fees
The repair may involve more than the failed gasket or seal. The invoice can include replacement fluid, a filter, a pan-cleaning service, new fasteners, cooler-line fittings, environmental fees, and shop supplies. The required fluid specification is especially important because the wrong fluid can affect shifting and transmission operation.
A low parts price does not necessarily mean a low total price. Before approving the work, ask the shop to separate parts, fluid, labor, diagnosis, taxes, and disposal charges so that the quoted scope is clear.
Why dealership estimates may differ from independent shops
Dealerships and independent repair shops may use different labor rates, parts sources, diagnostic procedures, and warranty terms. A dealership may recommend manufacturer-branded parts or a broader inspection, while an independent shop may offer more flexibility in parts sourcing. Neither estimate should be judged by the total alone.
Compare the written diagnosis, the repair method, the warranty, and the assumptions behind each quote. Guidance on evaluating repair estimates also applies here: a clear scope of work is more useful than choosing the lowest number without knowing what it includes.
How the leak’s location affects the price
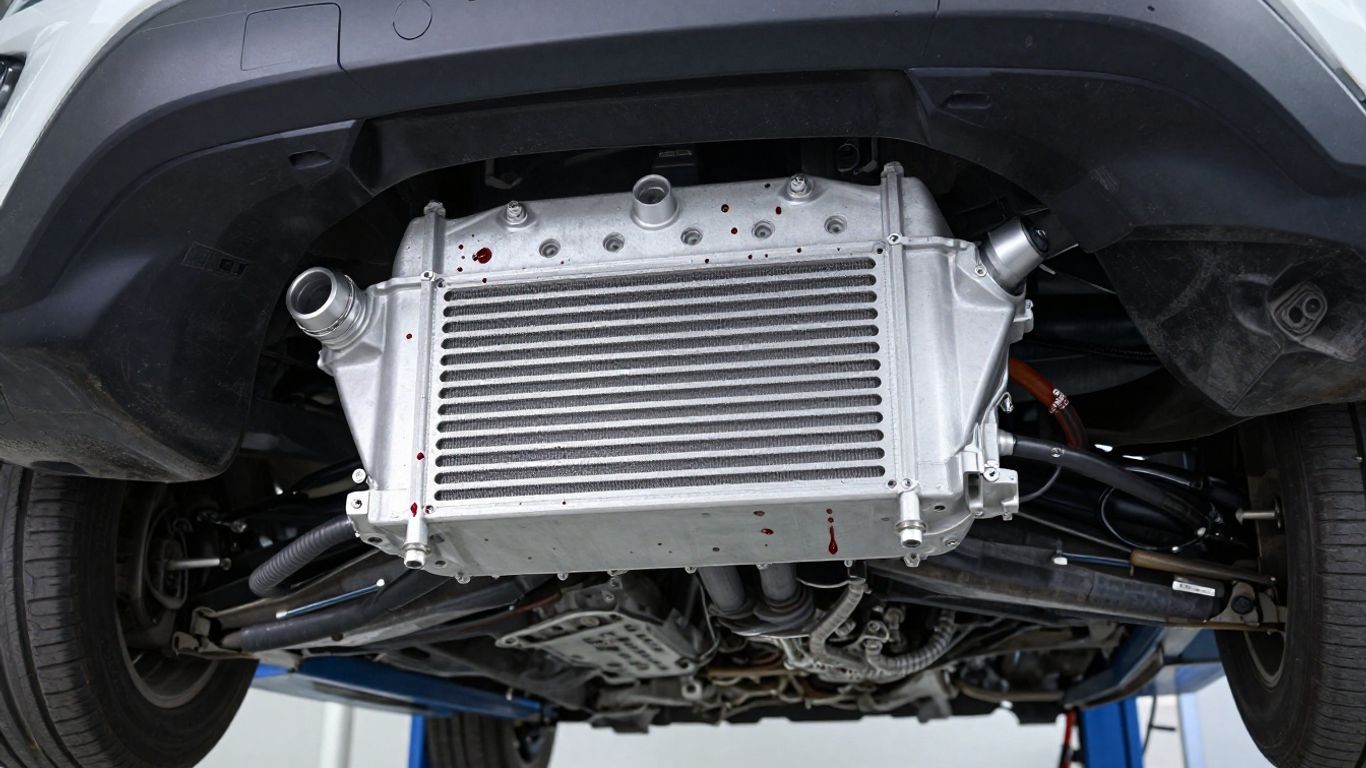
A transmission leak can appear in one place while originating somewhere else, since fluid may run along the case, crossmember, or underbody. Location therefore affects both the parts bill and the amount of labor needed to reach the failed component. External leaks are often simpler than leaks behind the torque converter or inside a damaged case. The mechanic should confirm the source before replacing anything.
Pan gasket and drain plug leaks
The transmission pan and drain plug are among the more accessible leak points. A worn gasket, loose fastener, damaged sealing washer, or distorted pan can allow fluid to escape, and repair may involve removing the pan, cleaning mating surfaces, and installing the correct replacement parts.
The job still needs care. Over-tightening pan bolts can warp the pan or damage threads, creating another leak after the repair.
Axle seal and output shaft leaks
Axle seals and output shaft seals sit where rotating shafts leave the transmission or transaxle. Replacement is more involved than a simple pan gasket because the axle, shaft, or related components may need to be removed for access. The estimate can rise further if the seal surface, bearing, or surrounding part is damaged.
Fluid around an axle does not automatically prove that the axle seal is the source. Cleaning and tracing the leak helps prevent replacing a seal when the fluid is actually coming from a higher point.
Transmission cooler line leaks
Cooler lines carry transmission fluid away from the unit and back again, so a cracked line, corroded section, loose fitting, or damaged connection can produce a steady leak. These repairs are often external, but access can be awkward and some vehicles use specialized fittings or assemblies.
A cooler-line leak deserves prompt attention because fluid loss can be rapid. Continuing to drive may leave the transmission without enough fluid for proper hydraulic operation and cooling.
Front pump and torque converter seal leaks
A front pump or torque converter seal is located at the transmission’s connection to the engine. Reaching it commonly requires removing or separating the transmission, which is why labor can dominate the estimate even when the replacement seal itself is inexpensive.
The mechanic should explain what evidence points to this location and whether other components will be inspected while the transmission is out. Bundling necessary access-related work can sometimes prevent paying for the same labor twice.
Cracked transmission cases and major damage
A cracked case, damaged pan, broken housing, or severe impact can make a leak substantially more serious. The repair may require replacing a housing or transmission, and internal damage may be discovered once the unit is opened. Low fluid can add clutch, bearing, gear, or valve-body damage to the original problem.
A common transmission leak guide is useful for understanding typical external leak points, but a visible puddle cannot reveal the condition of internal components by itself.
Warning signs of a transmission fluid leak
The first sign is often a spot beneath the vehicle, but leaks can also show up as shifting changes, smells, or unusual sounds. Transmission fluid may change color as it ages, so color alone cannot identify the exact problem. Treat the signs as reasons to inspect the vehicle rather than as a complete diagnosis. The sooner the source and fluid level are checked, the more options you generally have.
Red, brown, or pink fluid under the vehicle
Fresh automatic transmission fluid is commonly red or pinkish, while older fluid may appear brown or darker. A slick spot near the center or front of the vehicle may be transmission fluid, although engine oil, coolant, and other fluids can look similar in poor lighting.
Place clean cardboard under the vehicle if it is safely parked, and note the location and color of any new spot. Do not crawl beneath a vehicle supported only by a jack. A fluid leak warning guide offers another useful overview of colors and common leak points.
Low fluid levels and slipping gears
Low fluid can interfere with the hydraulic pressure and lubrication the transmission needs. Symptoms may include slipping, hesitation when selecting a gear, delayed engagement, or an engine that revs without the expected acceleration.
Check the level only according to the vehicle manufacturer’s procedure. Some transmissions require a specific temperature, a level surface, or a fill plug rather than a dipstick, so guessing can create a second problem.
Delayed shifting, grinding, or unusual noises
Delayed shifts, harsh engagement, grinding, whining, or clunking can indicate that the transmission is no longer operating normally. A leak may be involved, but these symptoms can also have other causes. Diagnosis should consider both the external fluid loss and the transmission’s operating condition.
Avoid testing a suspected slipping transmission through repeated hard acceleration. That can add heat and wear while making the eventual diagnosis less clear.
Burning smells and overheating
A burning odor may mean fluid has contacted a hot surface or that the transmission has been operating with excessive heat. Dark, burnt-smelling fluid is not proof of a leak, but it is a reason to stop treating the issue as cosmetic.
If warning lights appear, shifting becomes erratic, or the vehicle begins losing drive, pull over safely and arrange an inspection or tow. Heat and low fluid can compound each other quickly.
When a small leak becomes an urgent repair
A few drops can become urgent when the level is falling, the leak is active, or shifting symptoms are already present. A vehicle that leaves a large wet area, loses fluid after every drive, or struggles to engage a gear should not be driven to a shop unless a qualified professional says it is safe.
The practical rule is simple: do not ignore changing symptoms. A small external repair is usually easier to manage than damage caused by continuing to operate the vehicle with insufficient fluid.
How mechanics diagnose a transmission fluid leak
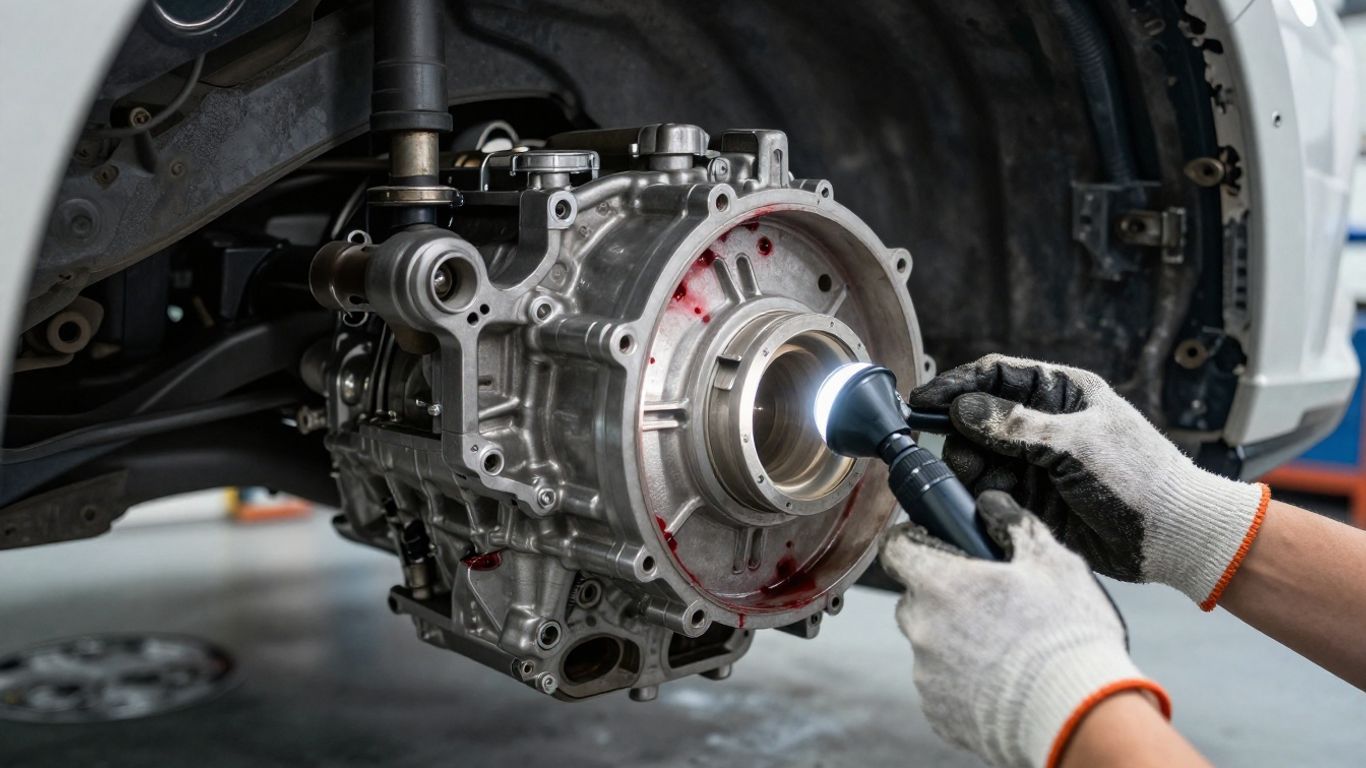
Diagnosis is a process of finding the source and assessing the consequences, not merely looking at the largest wet spot. Fluid can spread from a higher seal to a lower edge of the case, misleading a quick inspection. The mechanic may inspect the vehicle from above and below, verify the fluid level, and review the driver’s symptoms. The goal is to identify the failed component before parts are ordered.
Inspecting fluid color, level, and condition
The mechanic begins by checking the fluid’s appearance, smell, level, and condition using the procedure specified for that vehicle. Dark or contaminated fluid may suggest heat or wear, while a low level supports the possibility of an active leak but does not identify its location.
The inspection also considers whether the vehicle has the correct fluid. Mixing fluids or topping off with an unapproved product can complicate both diagnosis and repair.
Tracing the leak to its source
The underside is cleaned or inspected carefully so fresh fluid can be distinguished from old residue. The mechanic may follow the wet trail upward, check gaskets and seals, inspect lines and fittings, and look for impact damage around the pan and case.
This step prevents a common mistake: replacing the lowest visible seal even though the actual leak begins several inches higher. Source confirmation is especially important when multiple areas are wet.
Using dye or pressure testing
If the source remains uncertain, a technician may use an approved fluorescent dye and ultraviolet light, or another suitable testing method. Pressure testing may help reveal a leak that occurs only under certain operating conditions, but the method must match the vehicle and transmission.
Testing should be explained before it is performed. A good estimate identifies whether the charge covers the test, the diagnosis, or both.
Separating transmission leaks from engine oil leaks
Engine oil and transmission fluid can travel across nearby surfaces and appear in the same general area. Mechanics compare color, texture, odor, the location of wetness, and the condition of engine and transmission components to separate the two possibilities.
When the fluids are difficult to distinguish, cleaning followed by a short controlled run can make the new trail easier to identify. Guessing from a driveway puddle alone is unreliable.
Checking for internal transmission damage
Once the leak source is known, the mechanic considers whether the vehicle was driven with low fluid. They may look for slipping, abnormal engagement, noise, overheating evidence, contaminated fluid, or diagnostic codes. A leak repair cannot always reverse damage that has already occurred inside the unit.
That distinction should appear clearly on the estimate: repairing the leak is one task, while rebuilding or replacing a damaged transmission is another.
What the transmission leak repair process involves
The exact sequence varies with the failed component, but most repairs follow a straightforward logic: confirm the source, make the area accessible, replace the failed sealing or fluid-carrying part, restore the fluid level, and verify operation. Some jobs are completed from beneath the vehicle, while others require major component removal. The final invoice should reflect what was actually found rather than only the initial assumption.
Cleaning the transmission before inspection
Cleaning removes old fluid and road grime from the case, pan, lines, and nearby surfaces. This gives the technician a better chance of identifying the first point where fresh fluid appears.
Cleaning may be part of diagnosis rather than a cosmetic service. If it is listed separately, ask whether it is included in the inspection fee or charged as additional labor.
Replacing gaskets, seals, lines, or fittings
The failed part may be a pan gasket, drain-plug washer, axle seal, output seal, cooler line, hose, fitting, electrical connector seal, or front seal. Replacement usually includes removing the related component, preparing the sealing surfaces, installing the correct part, and tightening fasteners to the specified method.
Replacing only the visible wet component is not enough if the surrounding surface is bent, cracked, or worn. The mechanic should explain any related condition that changes the repair plan.
Refilling and checking the correct fluid level
After the leak is repaired, the transmission must be filled with the correct fluid and brought to the specified level. Some units require a particular temperature and fill procedure, so a simple dipstick assumption can be wrong.
The technician should inspect for fresh leakage after filling and document any fluid that was added. Overfilling can be harmful too, which makes the final level check an essential part of the repair.
Road-testing the vehicle after repair
A controlled road test can reveal delayed engagement, slipping, harsh shifts, or noises that are not apparent while the vehicle is stationary. The technician may then recheck the pan, seals, lines, and fittings for fresh fluid.
Road testing is more useful when it follows a documented baseline. If symptoms remain, the shop should say whether they relate to internal damage, a separate fault, or an unresolved leak.
A video demonstration can help a vehicle owner understand the general inspection sequence, but it cannot replace the service procedure for a specific transmission. Vehicle-specific instructions and safety requirements should take priority.
Additional repairs caused by low fluid
If the transmission has been operated with insufficient fluid, the repair may uncover burnt fluid, clutch wear, bearing damage, valve-body problems, or other internal faults. In that situation, stopping the leak may prevent further loss but may not restore normal shifting.
Ask the shop to distinguish confirmed damage from possible future risk. That makes it easier to decide whether to authorize additional testing immediately or obtain a second professional opinion.
DIY repair versus professional service
Some external repairs are within reach of an experienced home mechanic, but transmission work has unusual safety and fluid-level requirements. The right choice depends on access, tools, the vehicle’s service procedure, and confidence in identifying the true source. Saving labor is not worthwhile if the repair creates a new leak or leaves the transmission underfilled. When symptoms include slipping or noise, professional diagnosis is the safer first step.
Repairs that may be suitable for experienced DIYers
An experienced DIYer with reliable service information may be able to replace an accessible drain-plug washer, pan gasket, cooler-line section, or fitting. Even these jobs require a level surface, correct torque, proper fluid, and a way to inspect for leaks afterward.
A first-time repairer should not assume that a visible wet edge identifies the failed part. Cleaning and tracing are often more difficult than the replacement itself.
Tools and safety precautions for home repairs
A safe repair may require approved jack stands or a lift, wheel chocks, a drain pan, hand tools, a torque wrench, spill-control materials, and a suitable way to fill the transmission. The vehicle must be supported securely, and hot fluid should be allowed to cool before service.
Before starting, confirm these practical details:
- The vehicle is parked on a stable, level surface.
- The manufacturer’s fluid type and fill procedure are available.
- The vehicle is supported by equipment rated for its weight.
- Used fluid can be captured and disposed of properly.
Those precautions reduce the chance of injury and help prevent an incorrectly filled transmission. A home repair should stop if the source remains uncertain or access becomes unsafe.
Why seal replacement can require transmission removal
Some seals are positioned behind the torque converter or at the front pump, where they cannot be reached from outside the vehicle. Removing the transmission may require supporting the engine and transmission, disconnecting lines and electrical connections, and handling a heavy assembly safely.
That is a specialized job even for people comfortable with routine maintenance. The labor estimate reflects access and reinstallation time, not just the price of the seal.
Situations that require a qualified mechanic
Professional help is appropriate when the vehicle has delayed engagement, slipping, grinding, overheating, a fast leak, or a suspected internal failure. It is also the sensible choice when the transmission has no conventional dipstick or requires temperature-controlled filling.
A qualified shop can verify the source, assess damage, and stand behind the repair. If the first estimate is unclear, request a written explanation rather than attempting a complicated repair without the necessary information.
Risks of driving with an untreated leak
Driving with a leak can lower the fluid level until the transmission slips, overheats, or loses the ability to move the vehicle. Continued operation may turn a seal or line repair into a rebuild or replacement.
If the vehicle is leaving substantial fluid, shifting abnormally, or showing a warning light, towing is generally safer than gambling on a short drive. A transmission repair warning checklist can help organize the signs to report to a shop.
How to reduce transmission fluid leak repair cost
The cheapest repair is often the one completed before fluid loss causes internal wear. Cost control does not mean choosing the smallest quote or skipping diagnosis. It means getting a clear scope, using the correct parts and fluid, and addressing the issue while the repair remains external. A little preparation can also prevent a second visit.
Compare written estimates from multiple shops
Obtain estimates from more than one reputable shop when the vehicle can be driven safely or transported. Ask each shop to identify the suspected leak source, the repair method, labor hours, fluid requirements, warranty, and any diagnostic charge.
Comparison works only when the scopes match. A quote for a pan gasket should not be compared directly with one that includes a transmission flush, filter, inspection, and unrelated maintenance.
Ask what is included in the quoted price
A useful estimate states whether it includes cleaning, diagnosis, parts, fluid, seals, tax, disposal, road testing, and a post-repair leak check. It should also explain what could change the price after disassembly.
Use this repair estimate comparison guide as a reminder to examine the whole scope rather than focusing on one attractive line item. The guide concerns content pricing, but its broader habit of separating base cost from hidden additions is useful when reading any estimate.
Confirm the recommended fluid specification
Check the owner’s manual or ask the shop to name the exact fluid specification for the vehicle. Different transmissions can require different fluids, and a generic substitute may not be appropriate simply because it is labeled for automatic transmissions.
The estimate should state the fluid type and approximate quantity. If the shop proposes a service beyond leak repair, ask why it is needed and whether it is connected to the diagnosis.
Address leaks before they damage the transmission
Prompt attention is the most direct way to limit cost. A line, gasket, or fitting can be much less expensive to repair than the internal damage that follows prolonged low-fluid operation.
Avoid adding stop-leak products unless the manufacturer or a qualified technician specifically approves them. They may mask symptoms without correcting a damaged seal, line, or case.
Follow the manufacturer’s maintenance schedule
Regular maintenance can help identify fluid deterioration, leaks, damaged lines, and unusual shifting before they become roadside failures. Follow the vehicle maker’s instructions for inspections, fluid service, and transmission-specific checks rather than relying on a universal interval.
Keep receipts and note any new symptoms after service. A clear maintenance record gives the next technician useful context and can prevent duplicated diagnostic work.
Conclusion
Transmission fluid leak repair cost depends on access, the failed component, local labor, fluid requirements, and any damage caused by low fluid. Treat a new puddle or shifting change as a prompt for diagnosis, compare written estimates carefully, and avoid driving a vehicle that is losing fluid quickly or behaving abnormally.
Frequently Asked Questions
How much does it cost to repair a transmission fluid leak?
Minor external repairs may cost a few hundred dollars, while difficult seal repairs can approach or exceed $1,000. Internal damage can raise the total into the thousands.
Can I drive with a transmission fluid leak?
A very small leak may allow a short trip only if the fluid level and vehicle operation have been checked. A fast leak, slipping, overheating, warning light, or loss of drive is a reason to stop and arrange a tow.
What color is transmission fluid?
Fresh automatic transmission fluid is often red or pinkish. It may darken to brown as it ages, and color alone cannot distinguish it from every other vehicle fluid.
Is a transmission leak always expensive to fix?
No. A drain-plug seal, pan gasket, cooler line, or accessible fitting may be relatively straightforward. The price rises when access is difficult or low fluid has caused internal damage.
Can a transmission leak be fixed without removing the transmission?
Many external leaks can be repaired in place. Front pump and torque converter seal repairs, however, commonly require transmission removal for access.
Should I use a transmission stop-leak product?
Do not use one unless the vehicle manufacturer or a qualified technician approves it for that specific transmission. Such products do not repair every type of gasket, seal, line, or case failure.
How can I tell whether the leak is transmission fluid or engine oil?
Color, smell, texture, and location provide clues, but fluid can travel across nearby components. Cleaning and a professional inspection are more reliable than identifying the source from a driveway spot alone.